Photoshop, GIMP & Image Manipulation for History Exhibits
Digitization makes it easy to crop, combine, or touch up historic images before putting them on exhibit. There are many tools for this job, with Adobe Photoshop as the name brand professional choice. For my own projects, however, I usually prefer another app: GIMP (The GNU Image Manipulation Program), which is free, open source, and offers all the features I need even though it isn’t as powerful as Adobe’s product. Below I look at a couple examples of how either tool can be used to prepare images for exhibit.
Collaging and Layering 2D Images for Display
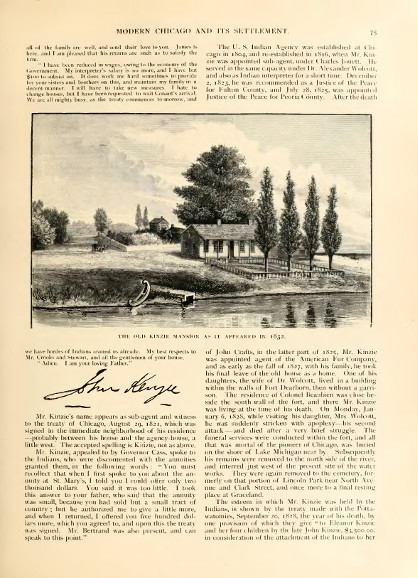
For my class project this semester, I have the opportunity to use Photoshop in the campus computer lab while preparing a new web exhibit on early Chicago history. Most or all of the materials for this exhibit will be two dimensional historic images or documents, many of which are black and white or grayscale, like the following images that my classmate Kyle Mathers uncovered.
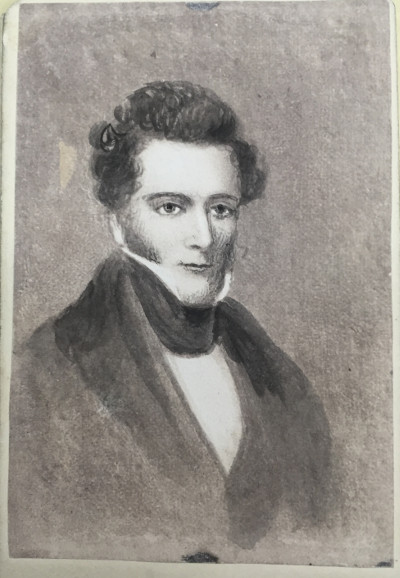
One way to liven up these gray images while also situating them in more historical context might be to create a collage layering them over a more colorful background, like this painting of Kinize’s House and Fort Dearborn as they might have looked around 1812.
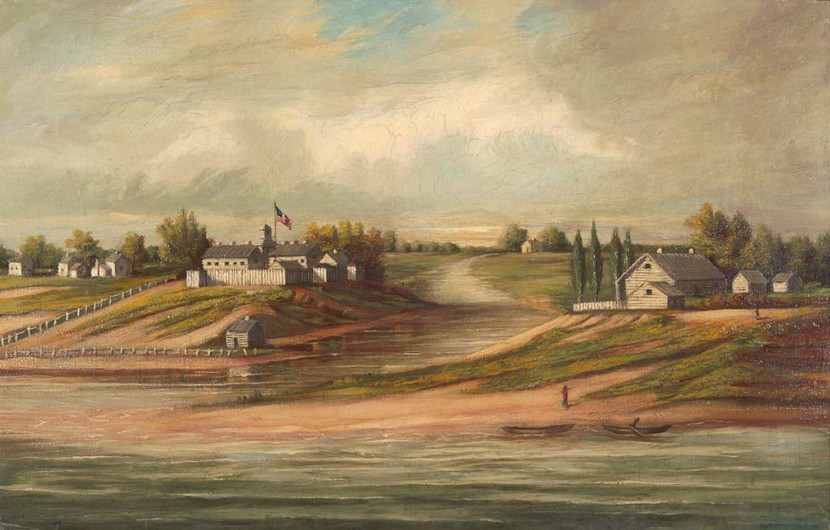
Using just a few quick steps in Photoshop, for instance — selecting image excerpts with the “Magnetic Lasso” and “Magic Wand” tools, resizing and layering them into place, and adding a slight drop shadow — I was able to create a collage-like scene that put Kinzie’s portrait and signature into the scenery of early Chicago. The result certainly has more color and depth than the portrait alone, but the collage effect is a bit tacky for my tastes. What do you think? Is the more immersive image worth losing the integrity of the original items? What role might collage serve for history exhibits?

Making 3D Artifacts Stand Out in 2D Photographs
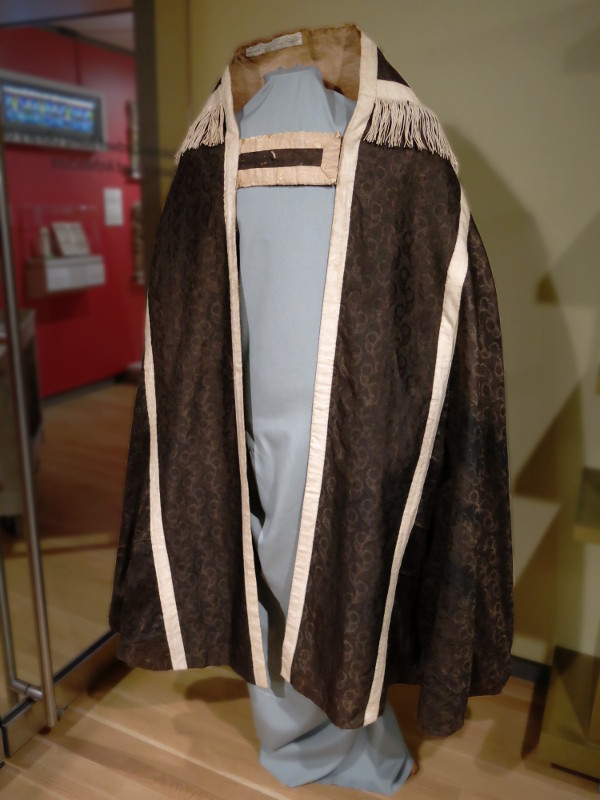
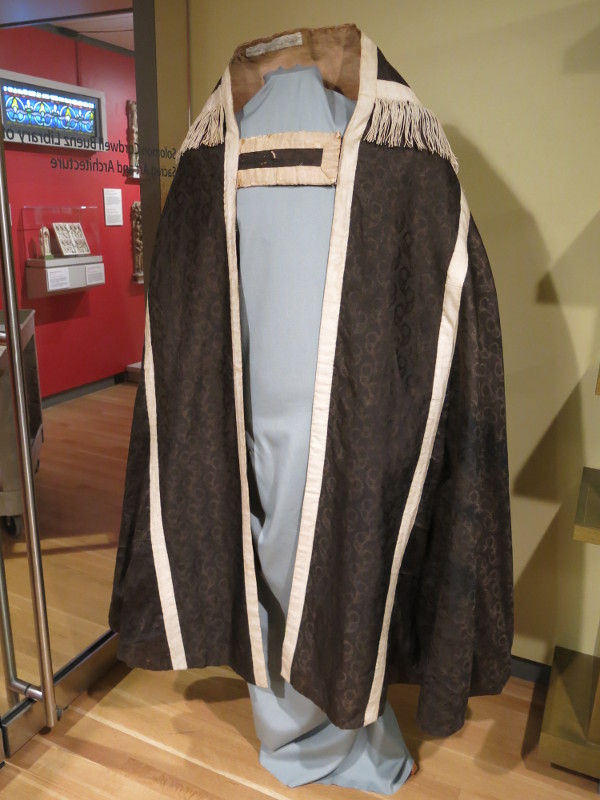
Another challenge of web exhibits is that two dimensional screen images can never fully capture the depth and texture of three dimensional museum objects. I don’t know yet if I’ll use any 3D artifacts for my exhibit this semester, but in my role as curatorial assistant to the Crossings & Dwellings Exhibition at LUMA in 2014, I took photos of several exhibit objects and used GIMP to try to pull these artifacts to the foreground of flat images. The effect is deliberately much more subtle than the collage above — I wanted the photos to remain naturalistic while spotlighting their primary subjects.
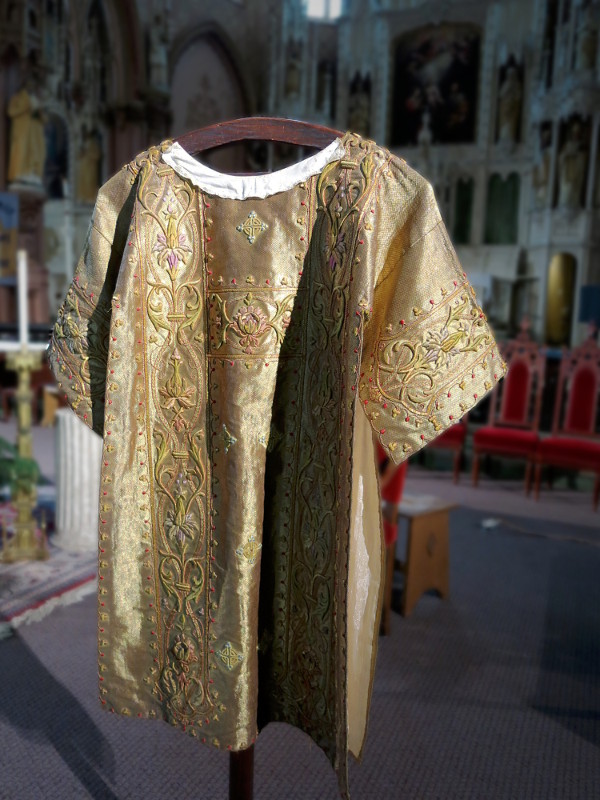
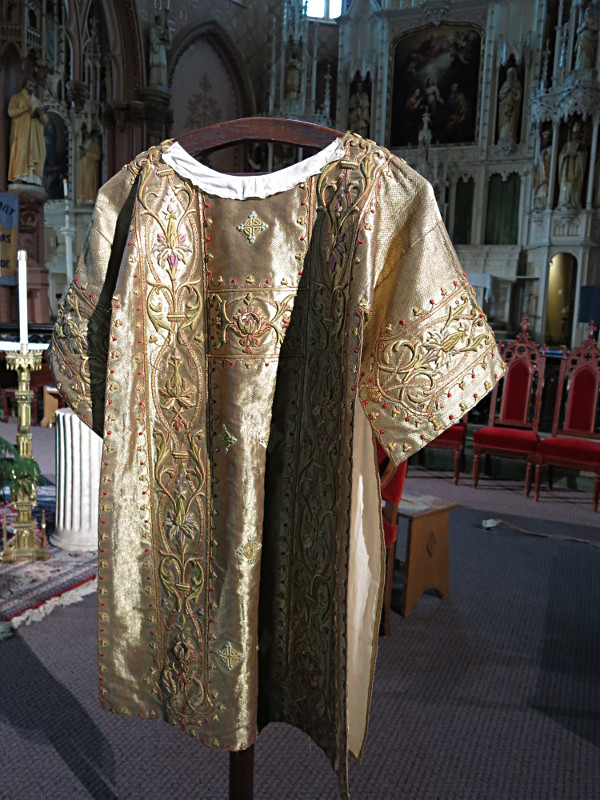
Simply by blurring the background a bit, adjusting the contrast, and using semi-transparient gradients to focus the lighting, I was able to make artifacts like a Gold Dalmatic acquired for Holy Family Parish in Chicago in the 1870s and a funeral cope at the Shrine of St. Ferdinand made by St. Rose Philippine Duchesne in about 1840 stand out more their from busy, colorful backgrounds.
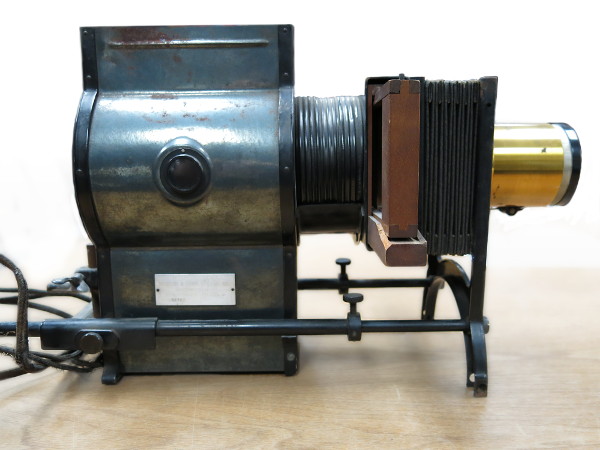
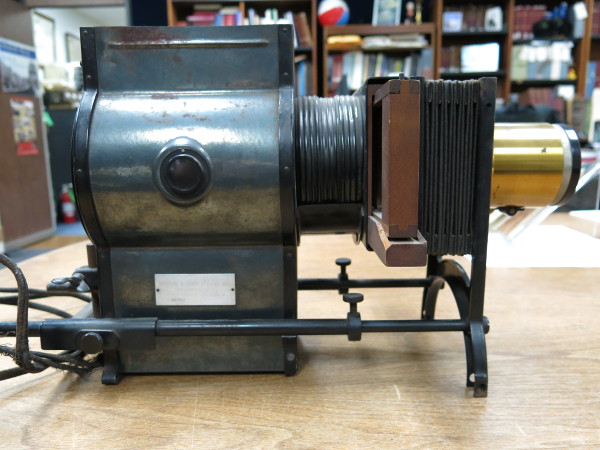
Ideally effects like these would be achieved using equipment like a high aperture lens and diffusers to better control lighting while taking the photos. Still, GIMP made it possible to create workable substitutes using just a point-and-shoot camera. The resulting images, at least in my opinion, put a stronger aesthetic spotlight on the featured artifacts. Removing the background altogether, as in the following image of a Balopticon from Holy Family Parish, can have an even bolder impact. On the other hand, using the same tools in reverse could help draw out the background of an image if that were the aim. With digital image editors, there are many possibilities.
Last Thoughts on Software for Image Editing
Any of the examples above could be accomplished in both Photoshop and GIMP. So which tool is best?
There is no question that Photoshop has more features, many of which, like non-destructive editing with adjustment layers, 32 bit color depth, or CMYK colorspace, have no substitute yet in GIMP. Photoshop and its file format are also the industry standard for professional photographers, printers, and graphic designers, so it can be essential when collaborating with practitioners in those fields. For quick personal or in-house image adjustment, though, most or all of these features are superfluous, and they come with a high price tag of perpetually ongoing subscription fees and high system requirements. Despite the premium pricing, Adobe’s Creative Cloud products have also had some big bugs in recent years, including a 2014 service outage exacerbated by DRM and a 2016 update that deleted Mac users’ backup files.
GIMP, meanwhile, is a completely free, community-driven project. It has fewer features, but those features still cover almost anything I could need as a public historian for adjusting images for the web. The smaller feature set also means that GIMP has lighter system requirements, and it doesn’t require registering an account or sharing data with anyone’s cloud server. Finally, while GIMP and Photoshop both have complex interfaces with many menus and toolbars, I personally find GIMP more intuitive to navigate — but this is probably more a matter of familiarity for me than anything else, as I’ve been using GIMP much longer. All in all, I’m happy to continue with this free tool for my projects, and I would encourage others to try out GIMP as well to see if it fits their needs.
One Response to "Photoshop, GIMP & Image Manipulation for History Exhibits":
You make a great point about the challenges of digitally reproducing three dimensional objects. I’ve encountered some online exhibitions and collections portals that allow you to rotate, enlarge, and otherwise manipulate objects so that you get a better sense of their dimensionality. But those 3-d imaging technologies are too expensive for smaller institutions or independent research projects like our class assignment.
I do think that the examples you’ve highlighted from the LUMA exhibition do a better job of showcasing the dimensionality of those objects than the unaltered photographs. That’s a useful technique that I’d like to try (along with GIMP).
Comments are closed.